
Walk into any finished room and look at the edges. The baseboards, the trim around the doors, the mantel, the railing on the stairs. Nobody thinks about them when they’re done right, but everybody notices when they’re not.
That’s finish carpentry. It’s the last stage of woodwork in a home, where the goal shifts from “will it hold?” to “does it look right?”
If you’re planning a remodel or just wondering what a finish carpenter actually does, this guide covers it. You’ll learn what finish carpentry is, how it differs from rough carpentry, the most common examples in a home, and when it makes sense to bring in a pro.
Quick answer: Finish carpentry is the visible, detail-focused woodwork installed at the end of a building or remodeling project, including trim, molding, built-ins, and railings. It happens after framing and drywall and before the final paint or stain.
What Is Finish Carpentry?
Finish carpentry is the visible, detail-focused woodwork added at the end of a building or remodeling project. It covers trim, molding, built-ins, and railings, the pieces that give a room its polished look.
A few things set it apart:
- It’s seen up close: Every joint, seam, and edge is on display.
- It’s precise: Cuts have to line up cleanly, even when walls and floors aren’t perfectly straight.
- It’s the final layer: It goes in after framing, drywall, and, in most cases, before the last coat of paint.
You’ll also hear it called trim carpentry. The two terms overlap heavily: trim work (baseboards, casing, crown molding) is the biggest part of finish carpentry, while finish carpentry also includes custom pieces like built-in shelving and stair parts.
Finish Carpentry vs. Rough Carpentry
Both are carpentry, but they happen at different stages and have very different goals. Here’s how they compare: home renovation permits in Connecticut
| Rough Carpentry | Finish Carpentry | |
|---|---|---|
| Purpose | Structure and support | Appearance and detail |
| Typical work | Framing, joists, rafters, subfloors | Trim, molding, built-ins, railings |
| When it happens | Early in the project | Near the end |
| Visibility | Hidden behind walls and floors | Seen every day |
| Margin for error | Fairly forgiving | Very tight |
| Common tools | Framing nailers, circular saws | Miter saw, finish nailer, block plane |
Rough carpentry builds the skeleton of the house. Finish carpentry is what makes it feel like a home. A slightly uneven stud gets covered by drywall, but a gap in a crown molding joint is right there at eye level.
Common Finish Carpentry Examples
Finish carpentry shows up in almost every room of a house. These are the most common examples:
- Baseboards: The trim along the bottom of the wall that covers the gap between wall and floor.
- Door and window casing: The framing around openings that hides the gap between the frame and the wall.
- Crown molding: The decorative trim where the wall meets the ceiling.
- Built-in shelving and cabinetry: Custom units made to fit a specific nook, wall, or room.
- Stair railings and balusters: The handrails and spindles that are both functional and a major visual feature.
- Wainscoting and paneling: Wall treatments that add texture and character, especially in dining rooms and entryways.
- Mantels: The surround above a fireplace, often the focal point of a living room.
In older homes, especially the kind common across Connecticut, trim often has more profile and detail than modern builder-grade pieces. Matching or restoring it takes extra care, which is where experienced finish work really shows. You can see how this looks in practice in our recent carpentry projects.
What Does a Finish Carpenter Do?
A finish carpenter takes a structurally complete house and gives it its final look. The job goes well beyond nailing up trim.
Here’s what the role typically involves:
- Measuring and planning: Taking exact measurements and working out how each piece will fit around corners, windows, and uneven walls.
- Cutting and fitting: Making precise cuts, including miter joints (two pieces angled to meet at a corner) and coped joints (one piece shaped to fit the profile of another).
- Installing: Securely fastening trim, molding, and built-ins without visible damage to the wood.
- Finishing details: Filling nail holes, caulking seams, and sanding so the surface is ready for paint or stain.
- Problem-solving: Adjusting for walls that aren’t plumb and floors that aren’t level, which is common in older homes.
The skills behind all this include joinery, a good eye for proportion, and solid knowledge of different woods and trim profiles. It’s slow, careful work, and the quality shows in the final result.
How Finish Carpentry Works: The Process
Most finish carpentry projects follow the same basic steps. Here’s what to expect as a homeowner:
- Consultation and measurements: The carpenter looks at the space, discusses your style, and takes measurements.
- Material and profile selection: You choose the wood type and trim style, such as a simple flat casing or a more detailed colonial profile.
- Cutting and test fitting: Pieces are cut and dry-fitted to check that joints line up before anything is fastened.
- Installation: Trim and custom pieces are secured in place.
- Caulk, fill, and sand: Seams are sealed, nail holes are filled, and surfaces are smoothed.
- Prep for paint or stain: The work is left ready for the final finish.
Timing depends on the scope. Trimming a single room can take a day or two, while built-ins or a full staircase can take longer.
Why Quality Finish Work Matters
Finish carpentry is the part of a project people see and touch every day, so small flaws stand out. Good work pays off in a few ways:
- Visual impact: Clean lines and tight joints make a room look complete and intentional.
- Home value: Well-installed trim and custom details add to a home’s overall appeal for buyers.
- Durability: Properly fastened and sealed pieces hold up better, with fewer cracked caulk lines and shifting joints over time.
Poor finish work is easy to spot. Look for gaps at the corners, uneven seams, trim that doesn’t sit flush against the wall, or caulk lines that crack within a few months.
These problems usually come from rushed measuring or skipped prep, and fixing them later often means pulling the trim off and starting over.
Should You DIY or Hire a Finish Carpenter?
Some finish carpentry is manageable for a confident DIYer. Other jobs are better left to a professional. Here’s a quick way to decide:
| DIY-Friendly | Better for a Pro | |
|---|---|---|
| Examples | Simple baseboards, basic shoe molding, painting trim | Crown molding, custom built-ins, stair railings, wainscoting |
| Why | Straight runs, forgiving materials | Complex angles, tight tolerances, structural safety |
| Risk if done wrong | Visible gaps | Wasted material, safety issues, costly redo |
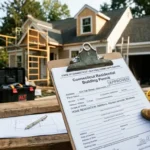
Crown molding is a good example. It sits at a compound angle, so even experienced DIYers often waste several lengths of expensive material getting the corners right. Stair railings are another one, since they also have to meet safety requirements. Before you start any larger remodel, it’s also worth checking whether you need a permit. Our guide to home renovation permits in Connecticut explains what to look for.
If your project falls on the pro side, a local carpenter who knows older homes and regional building practices makes a real difference. You can learn more about our team and how we work, or browse our finish carpentry services in Torrington, CT, from trim and molding to custom woodwork.
FAQs: What Is Finish Carpentry?
What’s the difference between finish carpentry and trim carpentry?
Trim carpentry is one part of finish carpentry. It covers baseboards, casing, and crown molding, while finish carpentry also includes custom built-ins, stair parts, mantels, and paneling. In everyday use, the terms often get swapped.
How long does finish carpentry take?
It depends on the scope. Trimming a single room usually takes a day or two, while built-in shelving or a full staircase can take several days or more. Custom work takes longer because it’s measured, cut, and fitted to your space.
Do I need a finish carpenter before painting?
Yes. Finish carpentry comes first, and painting comes after. The carpenter installs the trim, fills nail holes, and caulks the seams so the surfaces are smooth and ready for paint or stain.
What wood is best for trim in older homes?
It depends on the finish. Poplar is a popular paint-grade choice because it’s smooth and takes paint well, while oak, maple, and pine are common when the wood will be stained. In older homes, matching the species and profile of the existing trim helps new work blend in.
Ready to Start Your Project?
Finish carpentry is the final layer that turns a finished build into a home that feels complete. Knowing the basics helps you plan your project, ask better questions, and spot quality work when you see it.
If you’re thinking about trim, molding, built-ins, or custom woodwork, Ad Carpentry can help. Contact us for a quote on your project.